How to Connect Sonar to Salesforce

Connecting Sonar to a customer relationship management (CRM) system is an effective way for businesses to streamline their communication with customers and leads. Once the two systems are integrated, businesses can send and receive text messages directly through their CRM, allowing them to easily track and manage all of their customer interactions in one place.

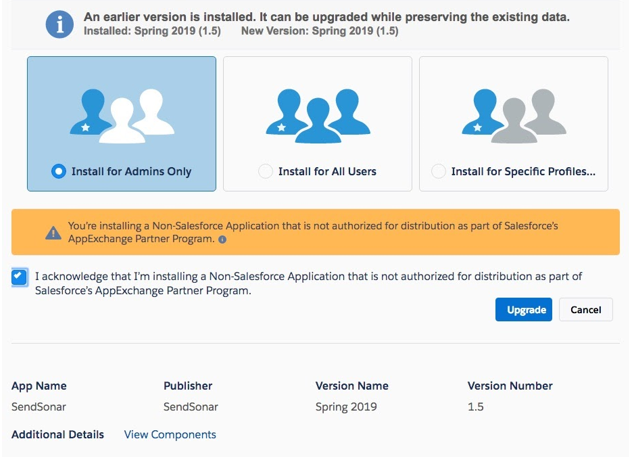
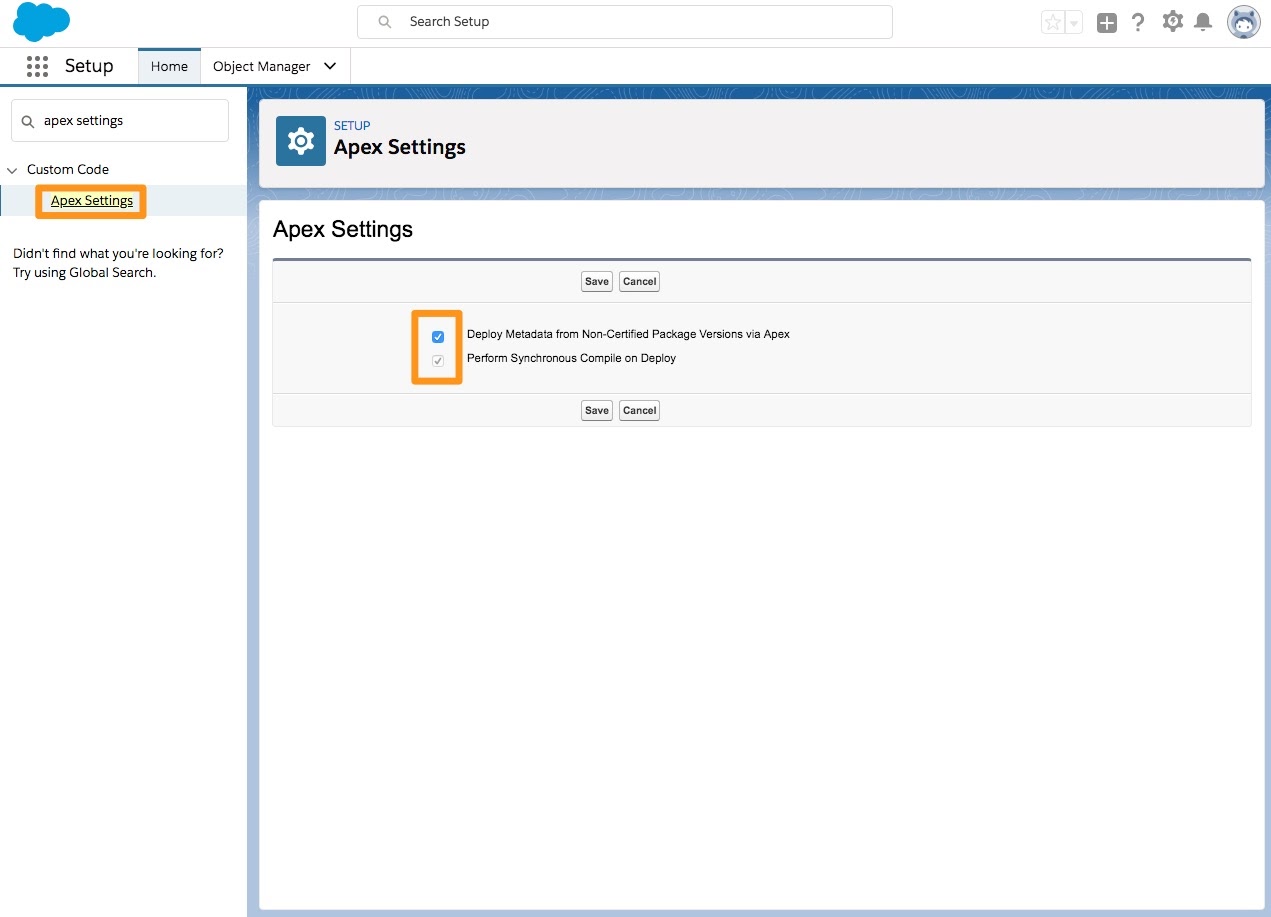
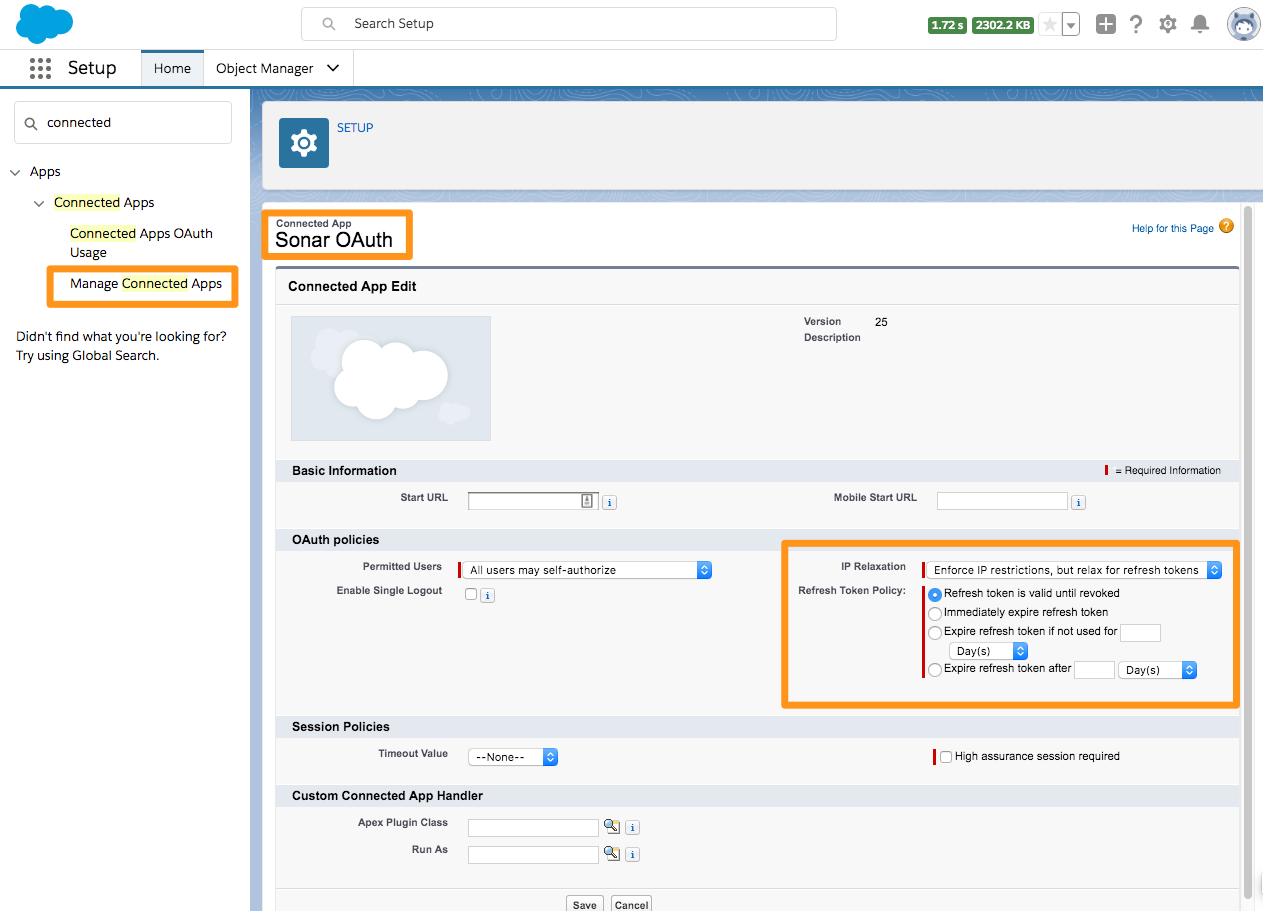
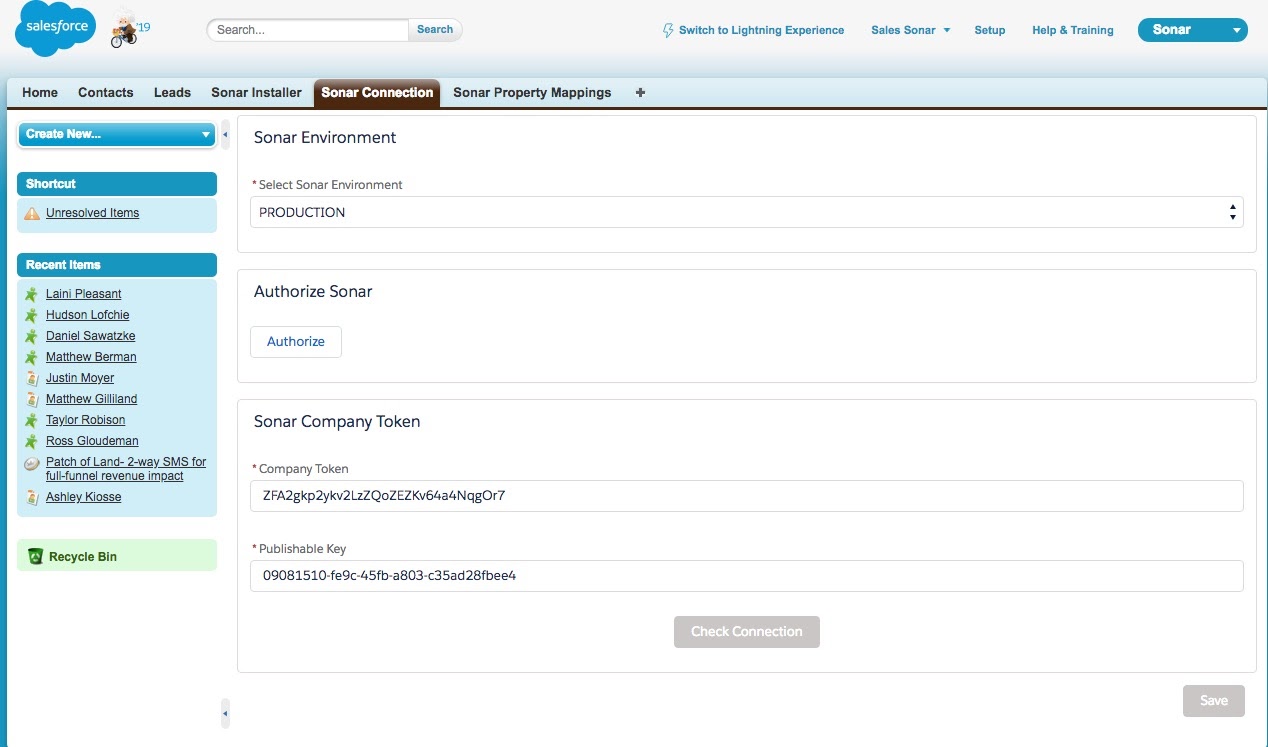
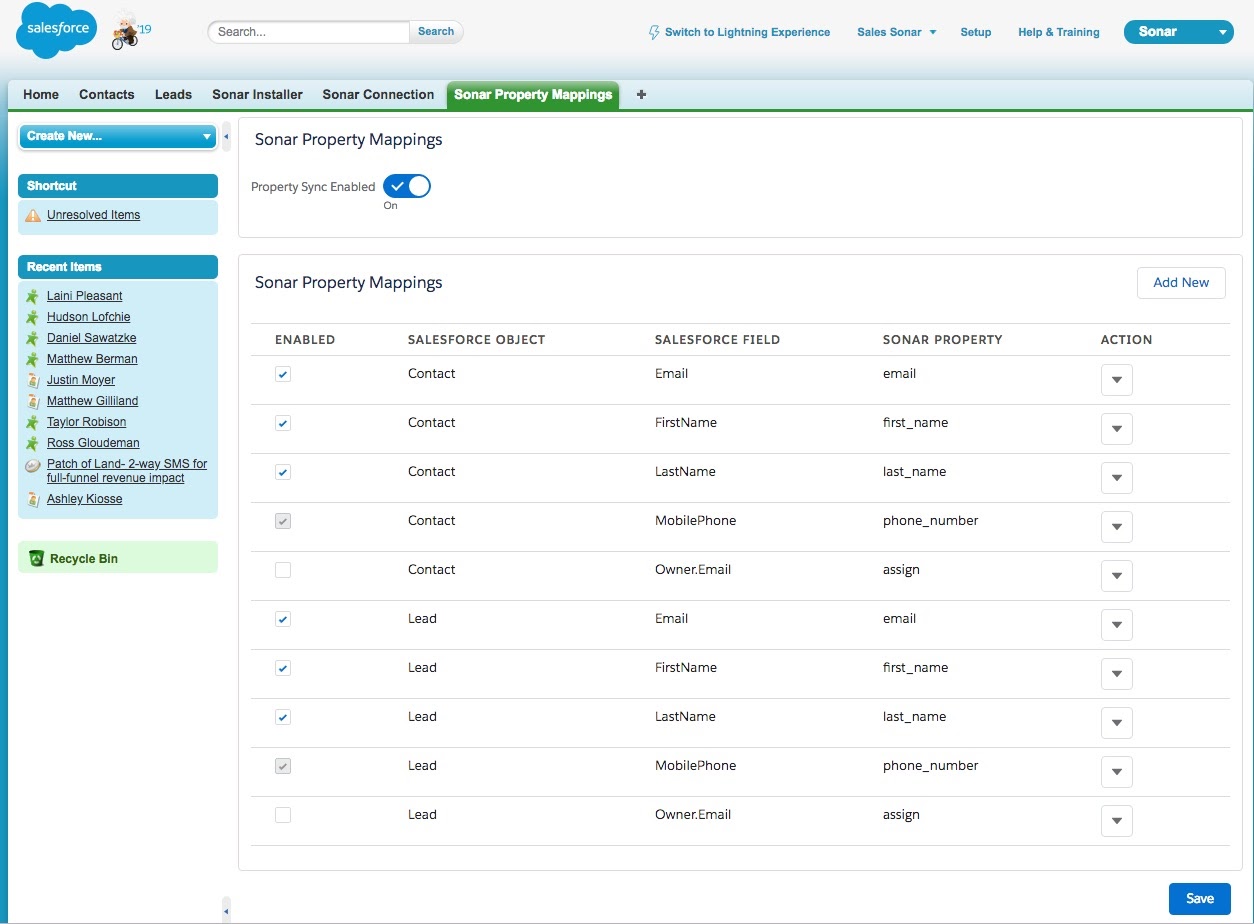
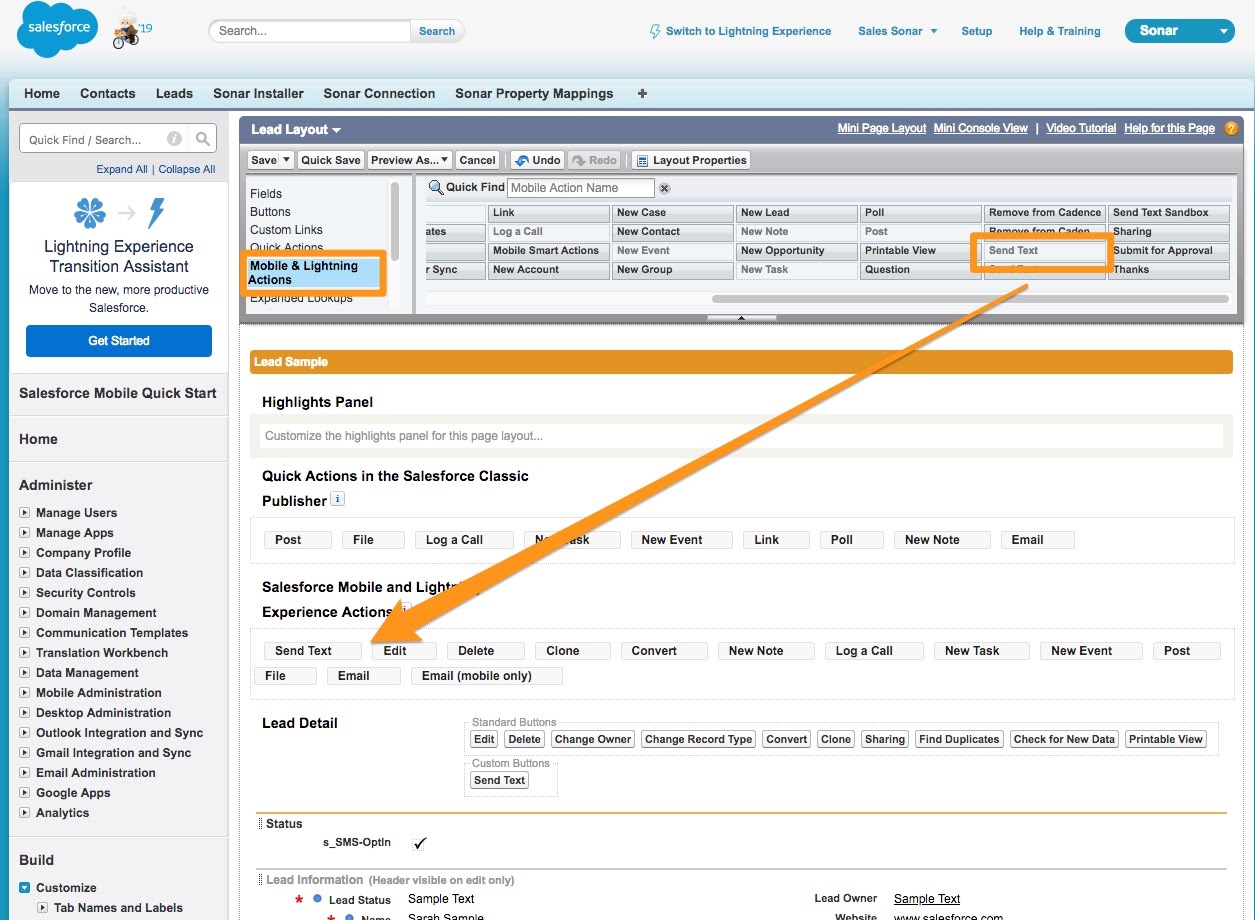
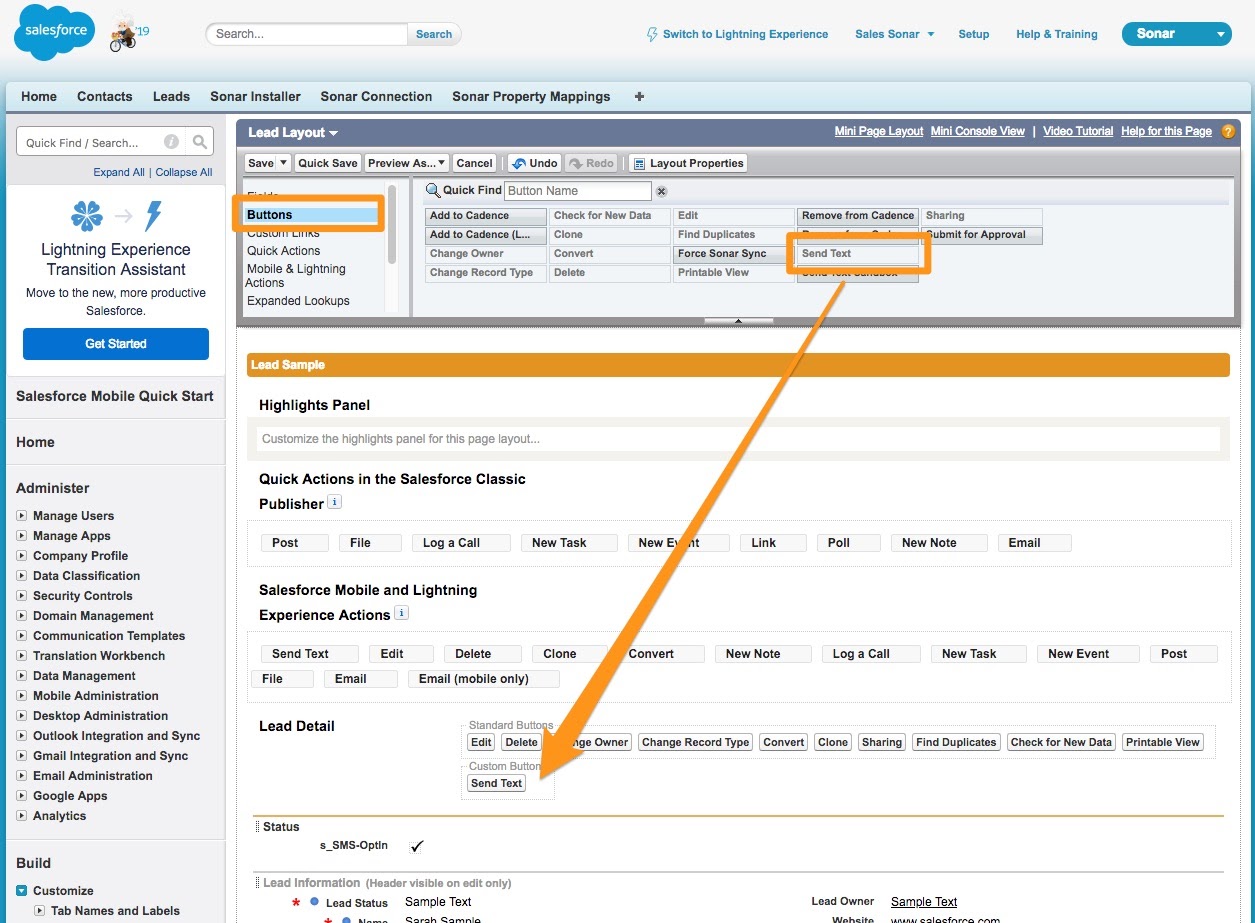
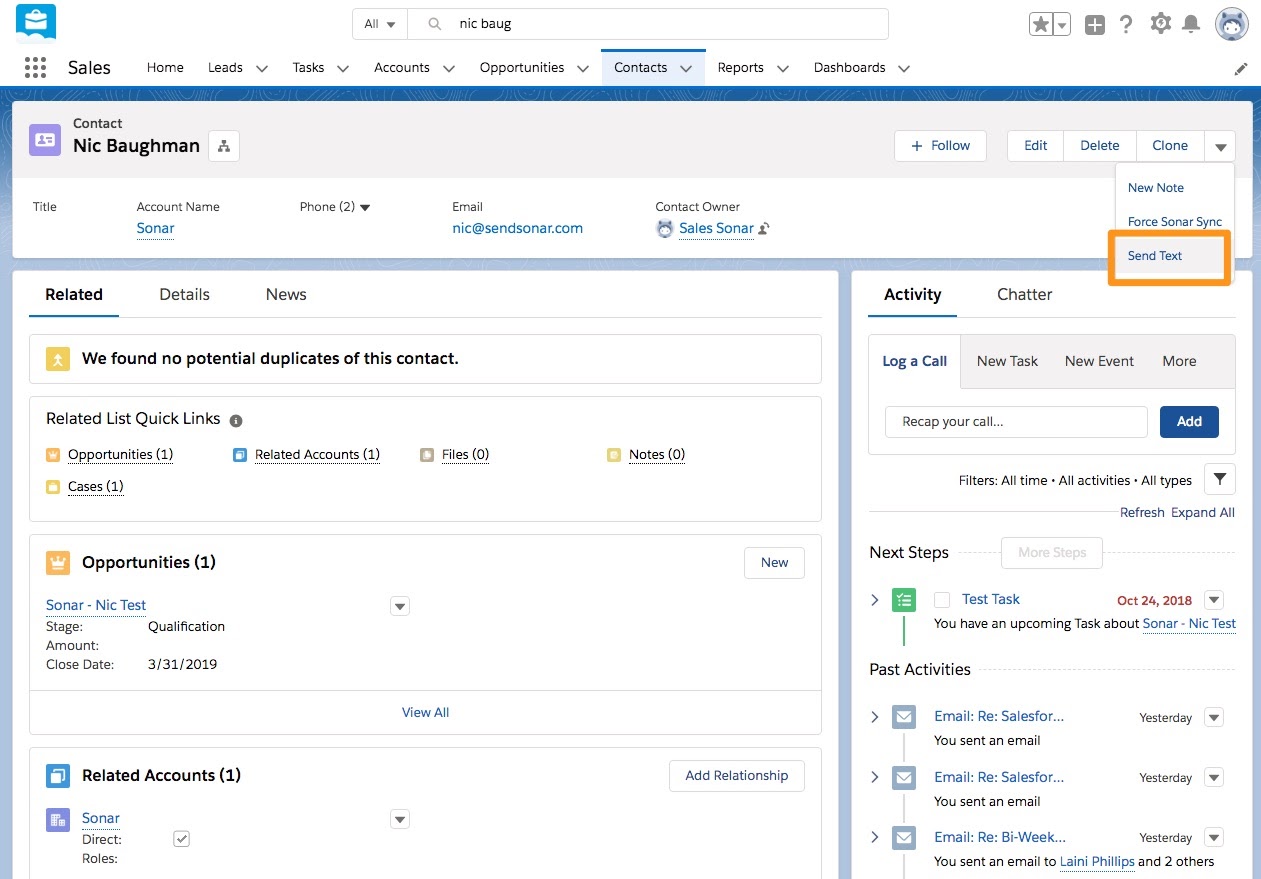
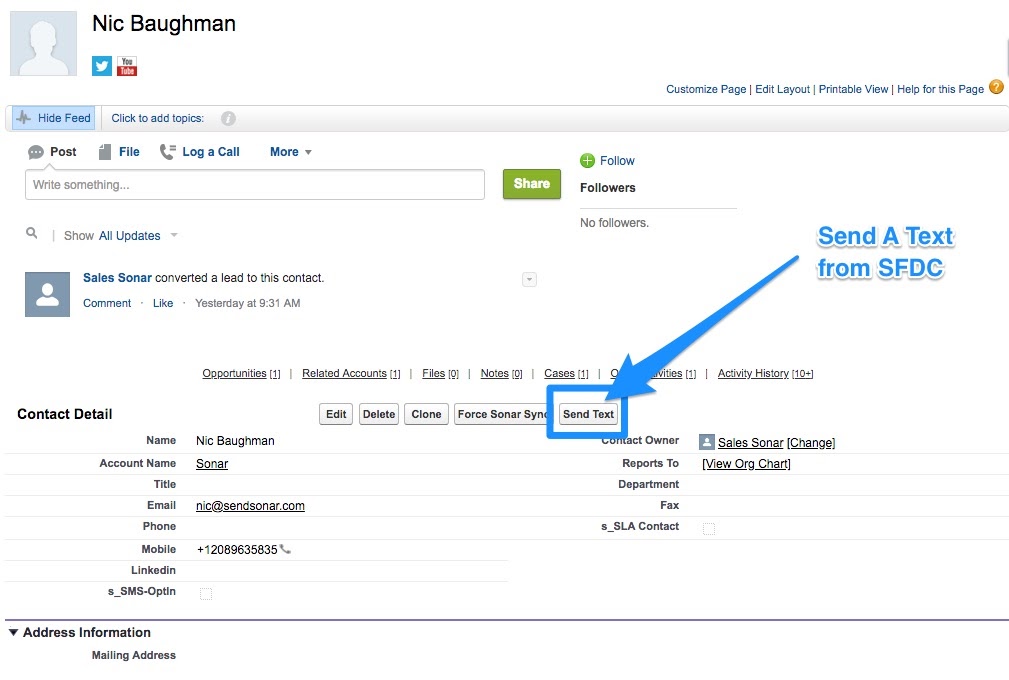
Sonar is built to integrate with hundreds of software technologies through Zapier. We also have several direct integrations with popular CRMs and provisioning platforms including Salesforce. This post provides an overview of how to install and implement Sonar’s Salesforce Integration. Our dedicated Partner Experience Team is also more than happy to walk you through the steps if you need assistance.

Step #1: Install Package

  1. Select Users who will have access to this package
  2. Click the acknowledgment option
  3. Select ‘Upgrade’ / ‘Add’ to add the package to your SFDC instance

Step #2: Update Apex Settings

  1. Click the ‘Deploy Metadata from Non-Certified Package Versions via Apex’
  2. Click Save

Step #3: Update Connected Apps

  1. Go to Setup
  2. Search and Click ‘Manage Connected Apps’
  3. Edit ‘Sonar OAuth’
  4. Update IP Relaxation to ‘Enforce IP restrictions, but relax for refresh tokens’
  5. Update Refresh Token Policy to ‘Refresh Token is valid until revoked’

Step #4: Sonar / SFDC Connection

  1. Select Environment (Production or Sandbox)
  2. Each Sonar account has a publishable key and private token; Add those to the Sonar Company Token area
  3. Check the connection
  4. If Connection is good, click ‘Authorize.’ Authorize allows for SMS messages to sync back to SFDC objects as tasks
  5. Click Save

Step #5: Sonar / SFDC Property Mapping

  1. Sonar out of the box can pull data from any properties on the Lead, Contact, and Opportunity pages within SFDC
  2. The Property Manager page allows you to select which pieces of data you want to send to Sonar from SFDC
  3. The Property Sync Enabled toggle is important to have enabled to sync these fields
  4. Click Save when finished mapping

Step #6: Setup Send Text Button

Salesforce Lightning

  1. Send Text button can be added to the Lead, Contact, and Opportunity Page.
  2. Locate and edit your desired Page Layout
  3. Select ‘Mobile & Lightning Actions’ from the layout options
  4. Click and drag the ‘Send Text’ button to the designated area. The order that you place these buttons will determine the order of buttons on a lightning page.
  5. Save Layout

Salesforce Classic

  1. Send Text button can be added to the Lead, Contact, and Opportunity Page.
  2. Locate and edit your desired Page Layout
  3. Select ‘Buttons’ from the layout options
  4. Click and drag the ‘Send Text’ button to the designated area
  5. Save Layout

Send Text From Salesforce Lightning

Send Text From Salesforce Classic

Share this:

bubbles icon Ready to streamline communication with your customers?

Get Started