This blog shows the steps in creating and scheduling campaigns.
Define
From the menu of the Sonar dashboard, selecting the Campaigns tab opens the below window. In this first tab, you can define details about your campaign, such as adding a name, description, and the initial copy you want to use.
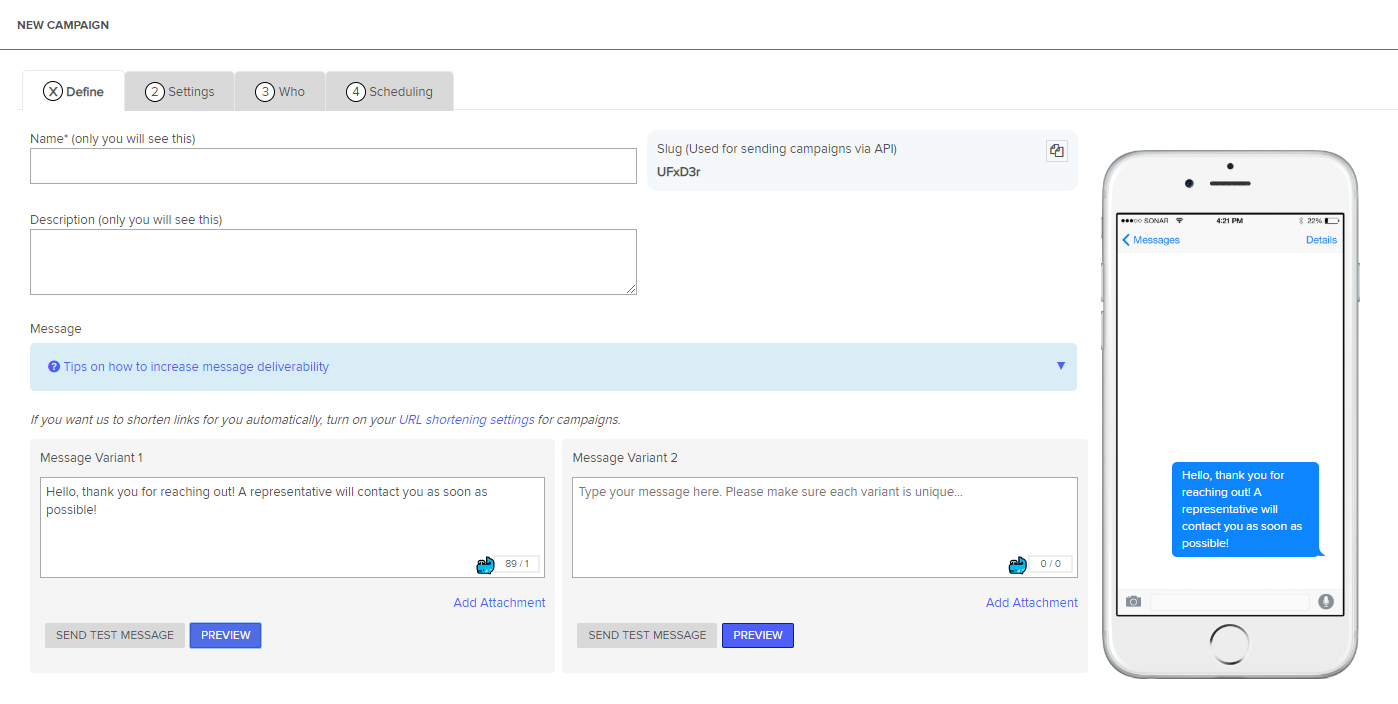
In the Name field, enter a name that will help you easily identify the campaign. You may also write in the optional Description field to add more context to your campaign. These Name and Description fields are internal and only admins see it. Next, enter two different text message variants. This is to help increase message deliverability and is great for A/B testing as well. To send yourself or others a test message, click on Send Test Message and enter the mobile phone number. If you click on Preview, you’ll see an example of what your message looks like on the right-hand side of the phone image. Click on Save & Continue to move onto the next section.
(Optional) The Slug can be used when sending campaigns via API. Click on the copy icon to copy the slug URL to give to your engineer.
Campaign Settings
We will bucket the responses you receive from campaigns. Let us know what type of response you’re expecting to receive by selecting one of the following:
- Yes or No
- Number (i.e. 1 – 10) — this is great for NPS scores or collecting feedback
- Example: “How you would rate our service, from 1-10?”
- Not sure what I’ll get (any response)
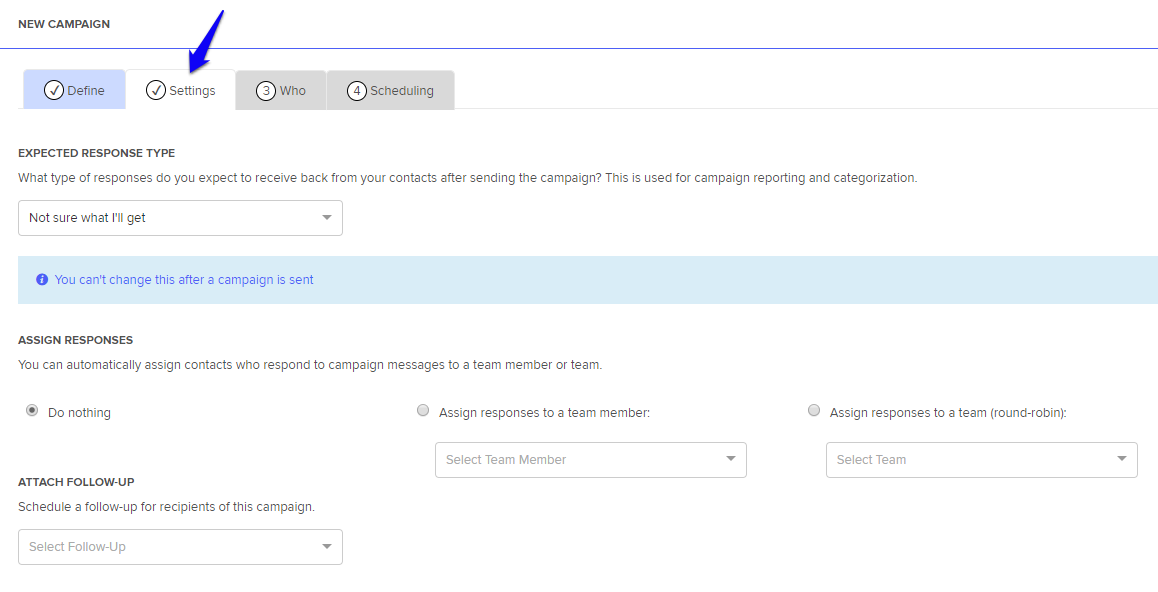
If you would like to automatically assign all responses from a campaign to a specific member or team, click Assign responses to a team member or Assign responses to a team (round-robin). Then, in the drop-down, select the member or team you would like to assign all responses from the campaign. There is also an option to schedule automatic Follow-Ups for the recipients of a Campaign.
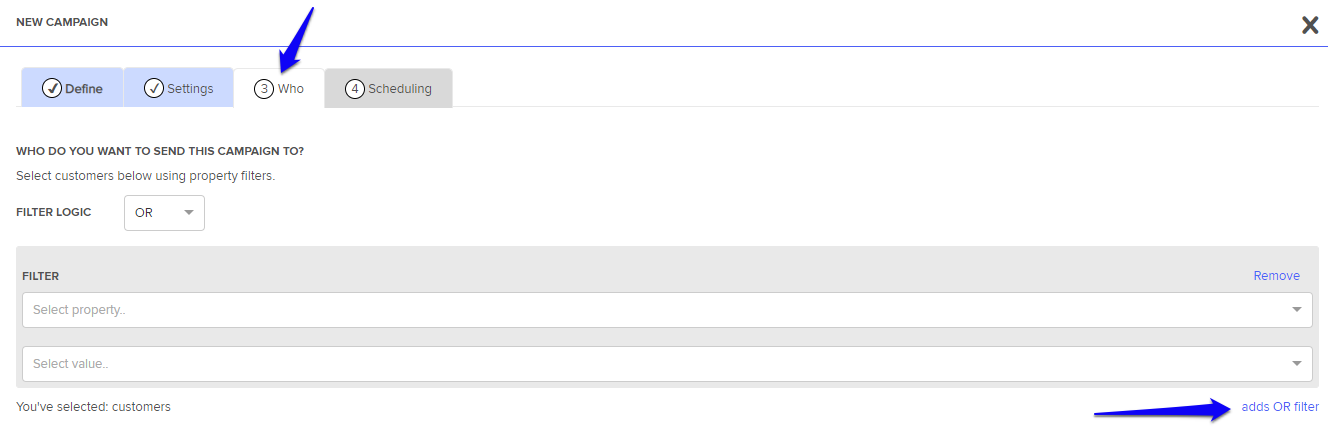
Who
This is where you select who your campaign will be sent to. In the Filter section, select the customers you want to send the campaign to based on their property, value, or import list. Properties must be set for the customer(s) first before you can send a campaign. You have the option to send to multiple segments of customers by clicking on the adds OR filter.
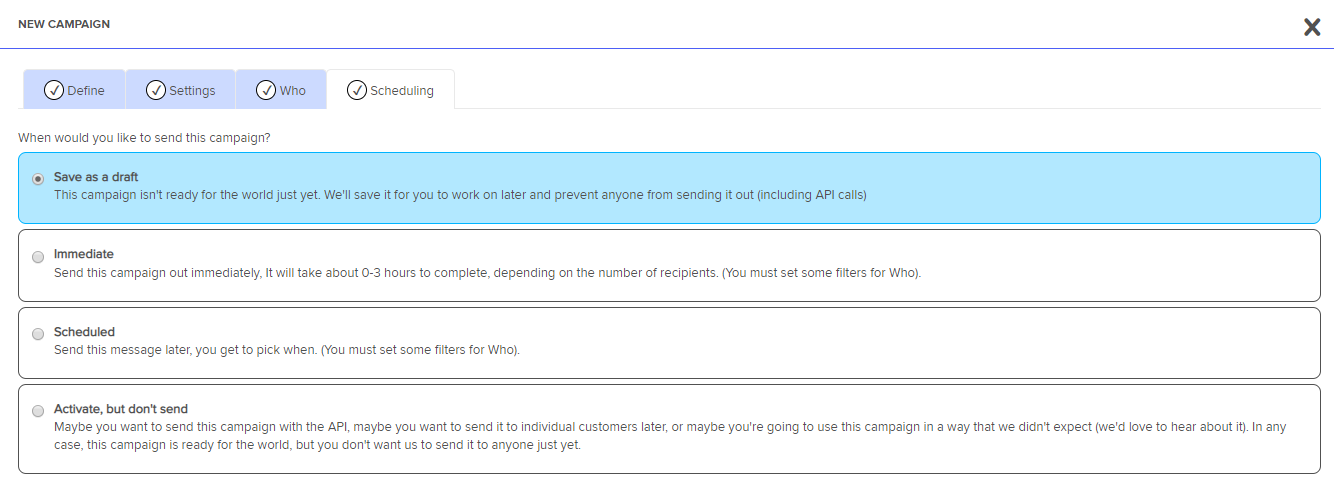
Scheduling
In the Scheduling tab, you can choose when you would like to send the campaign:
- Save as draft – This campaign isn’t ready for the world just yet. We’ll save it for you to work on later and prevent anyone from sending it out (including API calls)
- Immediate – Send this campaign out immediately, It will take about 0-3 hours to complete, depending on the number of recipients. (You must set some filters for Who).
- Scheduled – Send this message later, you get to pick when. (You must set some filters for Who).
- Choose a date and time.
- Time zone is dependent on your Company Settings in your Sonar account.
- Activate, but don’t send – Maybe you want to send this campaign with the API, maybe you want to send it to individual customers later, or maybe you’re going to use this campaign in a way that we didn’t expect (we’d love to hear about it). In any case, this campaign is ready for the world, but you don’t want us to send it to anyone just yet.
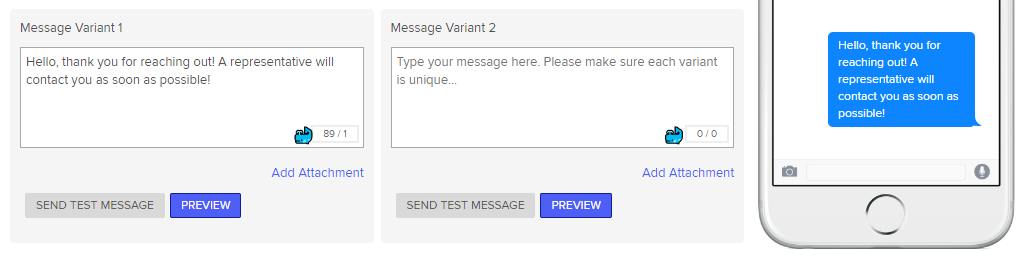
Editing Message Variants
Sometimes you want to change or edit the message variants in your campaigns. Here’s how you can from the Campaigns modal.
- Click on the Edit button for the Campaign you’d like to make changes to.
- In the Define tab, you’ll see two message variants with toggle button set to “ON“.
- Switch the toggle button to “OFF” for the message variant you want to change or edit.
- Click on + Add Variant to enter a new message variant or the edited version of your message variant.
- Click on Next and then Save & Activate.
Campaign Results
To check out the analytics and results of your campaign, click on View Results from the Campaigns screen.